Five 35-minute integrated blocks · development draft · educator/accessibility/local-syllabus review pending
Use beside English Days 76–80 and mathematics Days 76–80. The mathematics lessons teach and check direct capacity comparison with adult-controlled water transfer. This integrated week asks children to design a dry model of a comparison station: labelled A/B landing spaces and a clear route to show how an adult would transfer between two containers. The model may help someone understand the test; making a label or guessing from a vessel's shape is not capacity evidence.
Question: How can we make a container test safer and easier for someone else to follow?
National links: AC9TDEFK01 (notice familiar things designed by people), AC9TDEFP01 (generate, communicate, safely make and evaluate a purposeful solution), and AC9SFU03 (describe observed properties of the materials used). These are partial activity links. AC9MFM01 capacity belongs to the separate daily maths sequence. Check the locally adopted syllabus.
Set up the dry design task
- The user is a teacher or chosen class partner who needs to identify A and B, place empty unbreakable clear containers on a dry model and point to each safe fill line. The child-made board is never placed in the wet tray. The actual maths lesson uses a separate teacher-approved tray and equipment. The model must not alter the containers or cover their lines; a later water-safe adaptation would need adult checking. A visual guide can help someone follow the process without changing what the containers hold.
- Prepare two empty, clean, unbreakable containers; a dry model board; broad pre-cut recycled card, a smooth reusable plastic card or board, a clean non-latex foam strip if available, wide tape, thick black marker and large A/B letter-and-shape labels. An adult uses sharp cutting tools. Check reused materials for hygiene, rough edges and allergies; keep small loose parts away where unsafe. No live water, edible filler, glass, dye or child photograph is required in this integrated block.
- Show a teacher-made dry model with two blank landing zones and a simple arrow A → B. Invite children to alter it for an actual user. Letter labels alone may not be accessible; pair them with raised shapes, tactile edges or clear verbal labels. Ask the user what helps rather than assuming an access need from a person's appearance.
- For a learner who does not handle card, offer child-directed adult making, loose large placement pieces, drawing, tactile strips, AAC, sign or a quiet private user trial. Keep the child's choices and feedback visible. The separate maths water lesson retains adult pouring, spill tray and live result rules; this guide does not duplicate that test.
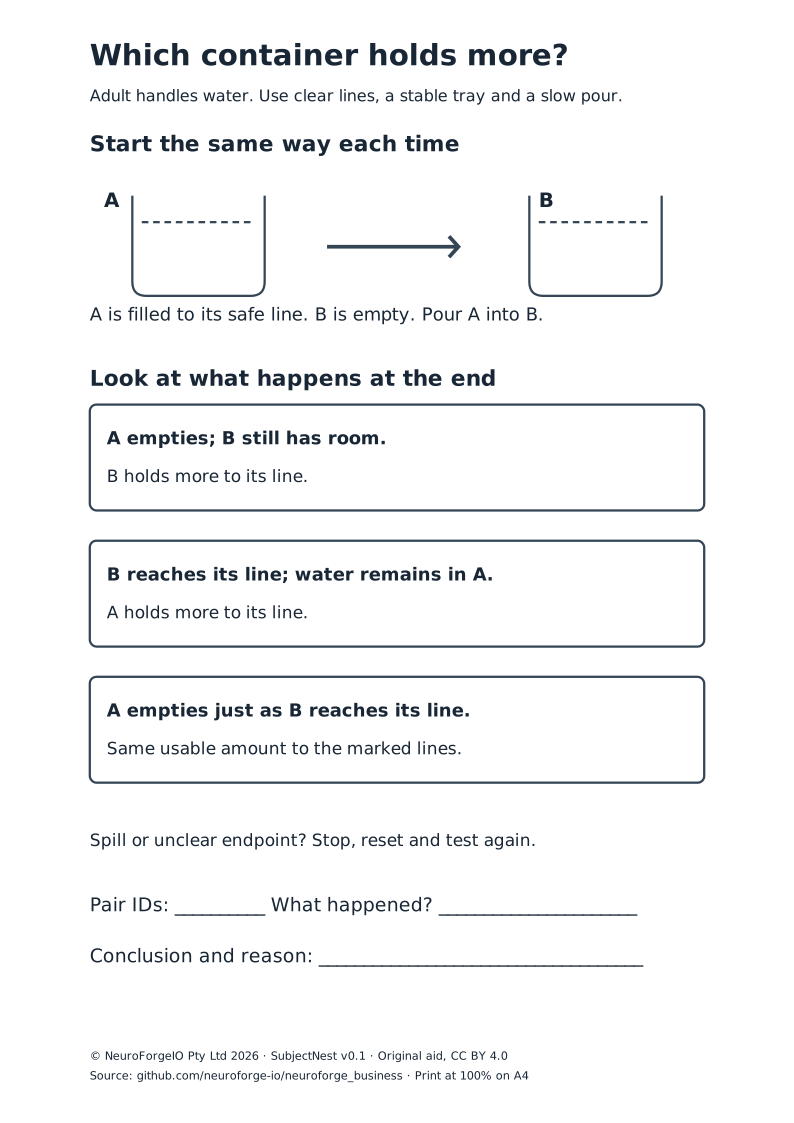
Day 1 — What does the user need to see?
- Purpose, 6 min: show the dry model board and empty containers. Ask, “If another person had to follow a safe test, where should A and B stand? What labels would help them?” Explain that the adult handles any later water in a separate wet tray.
- Observe materials, 10 min: let children look or feel, if welcome, at stiff card, smooth plastic and soft foam/cloth. Ask for observable words: stiff, bends, smooth, rough, compresses. Do not claim a material is waterproof, allergy-free or stronger without a relevant test. Record exactly which material the child examined and how.
- Try a layout, 14 min: children place large A/B paper zones on the dry model board, leaving the path between containers clear. A user places the empty containers and points to the fill lines. Ask, “Can you find each label? Can you see the line? Is the adult's path clear?” Record any real difficulty; do not call a dry placement trial a capacity comparison.
- Close, 5 min: child chooses one user need to design for tomorrow: visible labels, reachable zones, a clear arrow or a stable landing space.
Evidence: one observed material property and one user need grounded in the dry trial. If the learner did not inspect a material accessibly, mark that property evidence not observed.
Day 2 — Plan for one real user
- Retrieve, 5 min: show yesterday's user's exact comment or difficulty. Ask which part of the station could respond to it.
- Compare ideas, 10 min: offer two original examples: a high-contrast A/B card outside the tray, and a raised A/B landing outline. Ask what each helps and what it might miss. A child may combine or reject both with a reason.
- Plan, 15 min: child sketches, arranges loose pieces or dictates a dry model with two conditions: labels can be found by the chosen user, and the imagined adult transfer path stays clear. Ask, “Which material will you use? What did you notice about it yesterday?” A scribe records the child's words without adding unchosen design features.
- Close, 5 min: user or teacher repeats the plan back: “I think I would put A here and B here.” Child corrects any misunderstanding before making.
Next move: if a learner's plan relies only on colour, add a word, shape or tactile label and ask the user which cue works. This is a design adjustment, not a diagnosis of the learner.
Day 3 — Make a first dry station
- Recall safety, 5 min: the card design stays dry; the actual water test uses separate approved equipment. Leave a clear imagined transfer route on the model. Show the child's Day 2 plan and ask which step comes first.
- Make, 20 min: children or child-directed adults assemble broad pre-cut card/foam/label pieces. Use wide tape under adult guidance; no sharp cutter at the learner station. Mark A and B with letters and a shape or raised edge. If a ready-made mat is the accessible route, the child directs the placement and label choices rather than being assigned an identical design.
- Dry fit, 7 min: a user places the two empty containers in their model zones and points to both fill lines. Ask whether a label hides a line, a loose edge catches a container, or the path is awkward. Do not test stability with water.
- Store, 3 min: keep the first version and a dated mark of one thing to check tomorrow.
Evidence: purposeful choices and safe making steps. A tidy appearance by itself does not show that a user can follow the station.
Day 4 — Let the user try it and revise
- Set the test, 5 min: ask a willing user, adult or puppet operator to try the first station. The maker says only the purpose, not the exact placement steps, so the layout can be tested.
- Dry user trial, 12 min: user places two empty vessels in model A/B zones, points to fill lines and traces the imagined transfer route with a finger. Maker observes or listens. If stability is the focus, an adult gives one gentle touch to the model with only empty containers on a level surface; stop if a vessel tips. Record what happened, not “perfect” by default.
- Change one feature, 13 min: child revises a label, spacing, edge or arrow in response to the user's actual action or comment. Keep the first version or a dated drawing. Retest the changed feature the same way, including the same gentle touch if stability was tested. If the first version worked for this user, the child may test a different user or explain what remains untested instead of inventing a fault.
- Close, 5 min: child completes, “I kept/changed ___ because the user ___.” Accept demonstration, sign, AAC, drawing or exact dictated words.
Evidence boundary: this dry test can support AC9TDEFP01. It cannot establish which physical container holds more; that is checked in the maths lesson by adult-controlled water transfer.
Day 5 — Show the design and name its limit
- Choose, 5 min: child selects first and revised designs, material samples and the user feedback they want to explain. Public display is optional; a teacher or trusted peer can be the audience.
- Demonstrate, 14 min: user follows the revised dry model with empty containers. The maker or child-directed adult shows where labels, fill-line visibility and clear path were planned. Ask, “What did the user actually do differently, if anything?”
- Evaluate, 11 min: child names one observed material property and one design decision linked to the user. Ask what still needs a separate check: “We have not found which container holds more from this dry station.” If the station was used in a separately approved water lesson, name exactly what was observed there; do not imply every child watched it.
- Close, 5 min: record the first version, change, user response, access route and one next design/science move. Save work under school rules, not in a public upload.
Copy-ready dry station record
MY USER: ___________________  WHAT THEY NEED TO DO: ____________
MATERIAL I ACTUALLY EXAMINED: __________  I OBSERVED: __________
FIRST PLAN — A goes ____ B goes ____ LABEL/CUE: _______________
I MADE / DIRECTED: _____________________________________________
DRY USER TRIAL — the user did or said: _________________________
I KEPT/CHANGED: _______________________ BECAUSE: _______________
WHAT WE HAVE NOT TESTED HERE: __________________________________
TEACHER NOTE — exact child action, access, prompts, next move: ___
For a child ready for stretch, ask whether the board still works when the two empty vessels exchange places; the labels and arrow may need to move. For a child needing a simpler route, offer two large landing cards and one clearly chosen user. Neither route assigns a fixed learning style or turns a dry test into a capacity result. If a real water test is unsafe or unavailable, keep its maths evidence not observed until an appropriate direct demonstration can occur.
Source and reuse
Foundation codes were checked against Australian Curriculum v9 official downloads, workbook retrieved 29 September 2026, SHA-256 db446882d2c00cf7c085a03e250e2442fda6c44011fc114680c46c1dc7a822c3. ACARA terms govern its material and do not imply endorsement. The original guide is unpiloted and needs local design, science, safety, accessibility and curriculum review.
© NeuroForgeIO Pty Ltd 2026, “SubjectNest A Clear Place to Compare”, version 0.1.0-draft. Original design brief, examples, record and sequence are CC BY 4.0: credit NeuroForgeIO Pty Ltd, link the source and licence, and note changes. No third-party worksheet, image or media is embedded.